|
CarLibrary.org
promotes the creation of digital archives by car
historians, collectors, museums and collections with the use of the open-source Greenstone Digital Library program
and other software.
This
webpage describes using Google's Picasa and other Windows programs to improve the
identification - and eventual classification - of digital photos and
scanned documents and photos. This is not only highly useful for
Greenstone, but for many other programs which classify and display
digital assets.
A
further CarLibrary.org
webpage/topic on "Embedded Metadata" describes how to use
the open-source ExifTool program, which has more advanced functions to
add and modify metadata than Picasa or any yet tested photo imaging
software.
Any
experience gained from the steps below will be very useful to understand and
use the ExixTool program.
1.
Classifying and
Archiving Photos for Greenstone
Other topics/webpages
on this website - and many Internet guides - offer good
instructions on downloading and installing Greenstone.
A.
After the program is installed, digital files which have been captioned and tagged
can be dragged ("gathered") into
Greenstone (version 2.85 for Windows was used for the following
examples).
B.
No other metadata needs to be
added to any photograph in the Greenstone "Enrich" panel.
C.
In the "Design" panel, configure the
Greenstone Image "plugin" to extract "OIDmetadata dc:Description"
D.
"Create" the
collection. When this is complete, "Preview the Collection" and
you should see Picasa captions displayed in the "ex.XMP.Description"
metadata.
E.
This metadata category can be renamed in the Format panel as "Caption"
for the search results display. Greenstone will display the Picasa caption with each digital photograph.
F.
The
screenshot below (Figure 1) shows that Greenstone has also extracted the photo's file
name from "ex.Source" and the date it was taken from the EXIF metadata "ex.EXIF.DateTimeOriginal".
G.
Photos in
this trial
collection can also be found by searching for any desired text in the "Captions" or
"Photo Dates" categories.
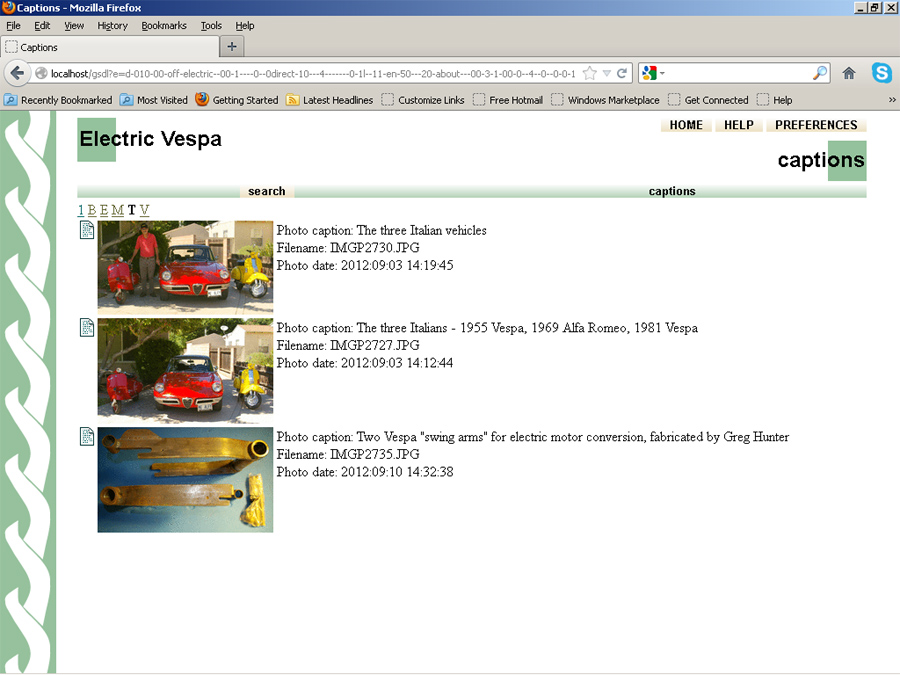
Figure
1- Screen
shot shows browse results on Captions starting with "T"
H.
Picasa Captions and Tags
(keywords)
can be used directly in Greenstone. Figure 2, below, shows results from browsing in the keywords
category, specifically to display the photo ID numbers, as embedded as
Picasa "tags."

Figure
2 - A display of keywords starting with "1", which show the photos
with the trial ID numbers starting with "12", etc. The
Greenstone "search" function can also be used to locate a specific
ID number - or other keyword.
A
Greenstone test
archive of 190 personal photos taken at the Mullin
Automotive Museum was made using only embedded metadata added with Picasa. The metadata includes location data for each
photo: latitude and longitude. The newest Greenstone, version 3.0, can use this data for map
displays.
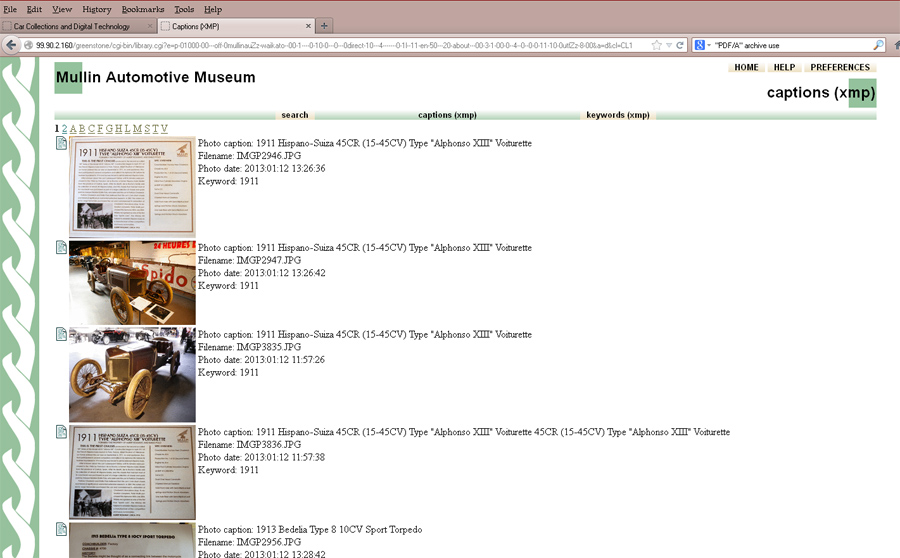
Figure
3 - An archive of Mullin museum photos, this is the initial display of
"Captions". Picasa was used to identify each image with captions and
"car make" and "car year" as tags/keywords. The file
names and photo dates are standard metadata embedded by the digital camera and
extracted by Greenstone automatically.
2.
Digital File
Recommendations
These
are based on these trials, practical considerations and guidelines for
archives (U.
S. National Archives and the Smithsonian
Institution):
Digital
Photographs:
a.
Use software such as the ExifToolGUI, Picasa or Photoshop to put
descriptions (captions) on each photo. Captions
will be very useful for later identifying the photo.
b.
Use tags to add "keywords" to each photo or group of photos.
c.
A unique ID number can be added to each photo, best as the
first "tag". Best museum/archive practice is to make this unique
number an "accession number". If you use the ExifToolGUI
to add an accession number, put it in the DC:Identifier category.
d.
Photos can be geo-tagged (Picasa red pin) to locate each photo or group
of photos on Google's maps.
e.
Save or export the photos for use in Greenstone or other
archive software at a resolution suitable for the archive's use.
Scanned
images:
a.
Scan at least at 300 dpi; best museum practice recommends 600 dpi.
b.
If "archive quality" is not a concern, scanning to JPG format is
"OK".
c.
If museum standards are desired, scan to TIFF or PDF/A format
(Note: "PDF/A" is a new standard for long-term archive
storage and use of digital images and documents).
d.
Use the same techniques as for digital photos above, to add captions, tags,
geo-tags to each image.
e.
Export the images. Some programs will convert TIFF images to JPG format;
image metadata will be preserved.
f.
However, many programs do not recognize PDF/A formatted images. Subject,
keyword and other identifying data can be added in the ExifToolGUI or a PDF editor, such
as Adobe Acrobat, ABBYY FineReader, or Lightning PDF Editor.
Scanned
Slides and Negatives:
a.
If you have the original negative or slide for any image, scanning the slide or negative
directly will almost always give better results than scanning
the photo previously printed in a darkroom or with a digital printer.
b.
The same steps for scanned images apply, except the most common
negative/slide format
- 35 mm - should be scanned at 2800-4000
dpi. This resolution should be within the optical resolution of
your scanner. Better quality scanners (usually those costing
more than $100 or scanners that are not part of a "all-in-one" printer) will give
better, near-professional archive quality results.
c.
The software included with your scanner may be adequate. You
should scan several slides or negatives and check the results to
determine whether you need a software upgrade or alternative.
Scanned
Documents:
a.
If text recognition (and later text searching) is not a concern, scan as
described above for images.
b.
However, text recognition is important!
Therefore scan to PDF, multi-image TIFF or PDF/A at 300 dpi or higher.
c.
Process each document with good optical character recognition (OCR)
software such as Adobe Acrobat, ABBYY FineReader or other tested and
proven OCR software. This software will also convert 600 dpi
TIFF files to OCR-text files.
d.
Add identifying information after the OCR process stage with the same
OCR software. This information will be located in the XMP
metadata category.
e.
The ExifToolGUI can also be used to add metadata to a PDF or PDF/A file if
the Workspace manager is configured for this function.
Note: TIFF files
are a long-recognized standard for archiving photos and scanned
images/documents. In a white paper "Guidelines for TIFF Metadata, Recommended Elements and Format", a
US
government standards organization recommends using "ImageDescription"
for the subject of the item and "ImageUniqueID" for a unique
file identifier. However, the seemingly logical "ImageUniqueID"
was empty for TIFF files, but very much in use for digital camera
images.
Email me with any comments, suggestions or
questions: Bob Schmitt, rgschmitt@gmail.com
|